刚刚无意中看到 X 大佬 @ccbikai 开发的两个开源项目,立即 Fork 然后在 Vercel 上部署了,欢迎来使用!
- 本机 IP 地址查询: https://myip.pengjiayou.com
- 全球 DNS 解析查询:https://dns.pengjiayou.com

刚刚无意中看到 X 大佬 @ccbikai 开发的两个开源项目,立即 Fork 然后在 Vercel 上部署了,欢迎来使用!

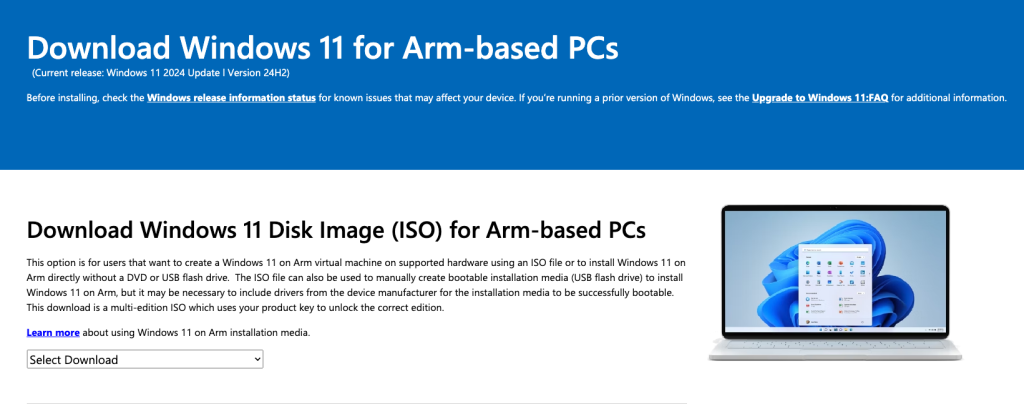
今年 10 月份微软就推出 Windows 11 24H2 正式版,不过彼时适用于 Arm64 架构的镜像文件并未发布,直到现在微软才公布镜像。这个 Arm 版的 Windows 11 适合这些人:
YouTube 上看到有人在树莓派 Raspberry Pi 5 或者香橙派 Orange Pi 5 上跑 Windows 11 ,也是需要这个 ISO 文件来安装。
有需要的用户请前往这里下载:https://www.microsoft.com/en-us/software-download/windows11arm64

最近飞牛 NAS 很火,不免俗的我也加入了自建 NAS 的队伍中,并且开启了公网 IPv6 地址,以便远程访问家里的 NAS 小主机,以及安装其中的各种 Docker 服务,甚至是家里的路由器等。
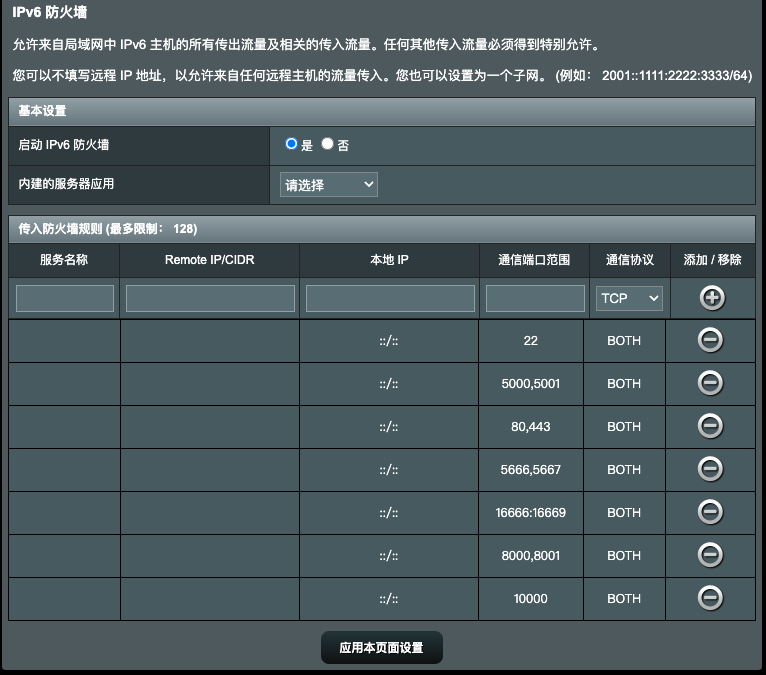
开启 IPv6 之后局域网内的所有设备都获得了 IPv6 地址,等于全部曝光在网络上,带来网络安全问题,这时候需要开启路由器的防火墙只放行必要的端口才行。
华硕官方有开启 IPv6 防火墙的说明文档,但是这个文档只介绍了针对特定设备的 IPv6 地址放行特定端口的方法,问题是我的 IPv6 地址每隔几天要变一次,也是动态分配的,它这个文档明显不行。
搜索到恩山论坛上的相关帖子,只要在本地 IP 地址填 ::/:: 就行了,我设置成这样,验证了一下确实可行。不过呢,我不太懂 IPv6 网络方面的知识,貌似这样的设置是对整个家里的局域网放行了特定端口,无所谓了,总比裸奔好多了吧。😄

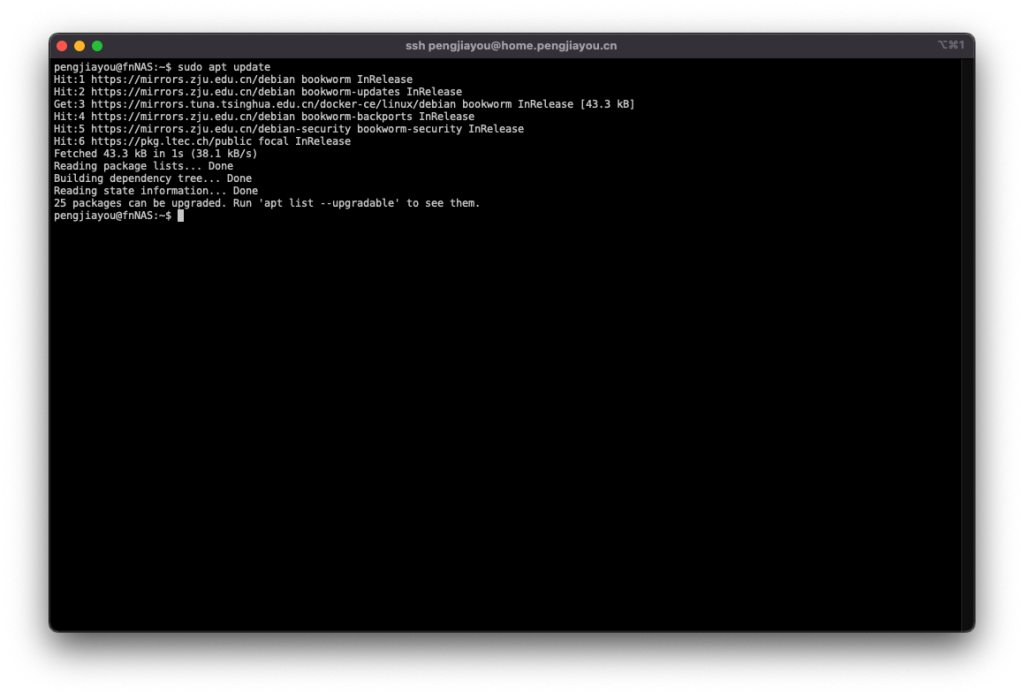
最近在折腾飞牛 NAS 和 CasaOS 系统,这两个系统底层都是 Debian 12 系统,为了更好的软件安装/更新速度,需要更改为国内的镜像站。
以前一直用清华大学或者中科大的镜像站,但这次在查询资料的时候发现了一个校园网联合镜像站 MirrorZ ,MirrorZ 提供对校园网镜像站的索引和跳转服务,配置好了之后可以根据你的线路(电信/联通/移动)和地理位置自动切换到速度最快的校园网镜像。
MirrorZ 支持各主流 Linux 发行版,比如 Debian, Ubuntu, Arch, Fedora 等等,以下是 Debian 12 使用 MirrorZ 镜像的方法:
最新的 Debian 12 把软件源的配置调整为了 DEB822 格式。不仅配置代码风格大改,文件位置也有了变化。之前软件源的文件位置是 /etc/apt/sources.list,现在是 /etc/apt/sources.list.d/debian.sources ,修改这个文件的内容如下:
Types: deb
URIs: https://mirrors.cernet.edu.cn/debian
Suites: bookworm bookworm-updates bookworm-backports
Components: main contrib non-free non-free-firmware
Signed-By: /usr/share/keyrings/debian-archive-keyring.gpg

# 默认注释了源码镜像以提高 apt update 速度,如有需要可自行取消注释
# Types: deb-src
# URIs: https://mirrors.cernet.edu.cn/debian
# Suites: bookworm bookworm-updates bookworm-backports
# Components: main contrib non-free non-free-firmware
# Signed-By: /usr/share/keyrings/debian-archive-keyring.gpg

# 以下安全更新软件源包含了官方源与镜像站配置,如有需要可自行修改注释切换
Types: deb
URIs: https://mirrors.cernet.edu.cn/debian-security
Suites: bookworm-security
Components: main contrib non-free non-free-firmware
Signed-By: /usr/share/keyrings/debian-archive-keyring.gpg

# Types: deb-src
# URIs: https://mirrors.cernet.edu.cn/debian-security
# Suites: bookworm-security
# Components: main contrib non-free non-free-firmware
# Signed-By: /usr/share/keyrings/debian-archive-keyring.gpg

# Types: deb
# URIs: http://security.debian.org/debian-security
# Suites: bookworm-security
# Components: main contrib non-free non-free-firmware
# Signed-By: /usr/share/keyrings/debian-archive-keyring.gpg

# # Types: deb-src
# # URIs: http://security.debian.org/debian-security
# # Suites: bookworm-security
# # Components: main contrib non-free non-free-firmware
# # Signed-By: /usr/share/keyrings/debian-archive-keyring.gpg
当然啦,你也可以修改 Debian 默认的软件源配置文件 /etc/apt/sources.list ,从 Debian12 开始,对于容器镜像,其软件源配置文件变更为 DEB822 格式。Debian 12 还在默认使用传统的One-Line-Style 的软件源配置文件即 /etc/apt/sources.list ,但是像 Ubuntu 24.04 已经默认把这个文件删除了,不管是软件源还是容器镜像全部使用 DEB822 格式,所以我还是建议切换到 DEB822 ,反正我已经这么干了。
刚刚看到 Amazon Lightsail 除了 FreeBSD 12 镜像之外,现在终于提供 FreeBSD 13 的镜像了,赶紧把之前的老版本删了,重新开了一个 13 版本的 Instance 。为了以后参考方便,写一点折腾记录。
首先 Lightsail 默认在系统创建了一个名为 ec2-user 的用户名,需要下载官方提供的证书,
sudo chmod 400 Downloads/LightsailDefaultKey-us-west-2.pem然后就可以在 macOS 自带的终端通过 ssh 连接服务器了。
ssh -i Downloads/LightsailDefaultKey-us-west-2.pem [email protected]出现下面的画面表示连接成功,通过执行 su – 命令可以切换到 root 用户。
Last login: Wed Nov  8 07:11:50 2023 from 115.211.241.18
FreeBSD 13.2-RELEASE-p4 GENERIC

Welcome to FreeBSD!

Release Notes, Errata: https://www.FreeBSD.org/releases/
Security Advisories:   https://www.FreeBSD.org/security/
FreeBSD Handbook:      https://www.FreeBSD.org/handbook/
FreeBSD FAQ:           https://www.FreeBSD.org/faq/
Questions List:        https://www.FreeBSD.org/lists/questions/
FreeBSD Forums:        https://forums.FreeBSD.org/

Documents installed with the system are in the /usr/local/share/doc/freebsd/
directory, or can be installed later with:  pkg install en-freebsd-doc
For other languages, replace "en" with a language code like de or fr.

Show the version of FreeBSD installed:  freebsd-version ; uname -a
Please include that output and any error messages when posting questions.
Introduction to manual pages:  man man
FreeBSD directory layout:      man hier

To change this login announcement, see motd(5).
To set a custom ZFS property on the mypool pool, you need to provide it
using the "key1:key2=value" syntax, where the colon (:) is used as the
separator and identifier from the built-in ZFS properties:

# zfs set warranty:expires=2038-01-19 mypool

The custom property is applied to all datasets and can be queried like any
built-in properties using zfs get:

zfs get warranty:expires mypool

To reset the value of a custom property, use the inherit subcommand:

# zfs inherit warranty:expires mypool

Removing a custom property from a pool is done using the -r flag to the
"zfs inherit" command:

# zfs inherit -r warranty:expires mypool

		-- Benedict Reuschling <[email protected]>
ec2-user@freebsd:~ $ su
root@freebsd:/home/ec2-user #使用 adduser 命令新建一个用户:
root@freebsd:/home/ec2-user # adduser
Username: pengjiayou
Full name: Charles Peng
Uid (Leave empty for default):
Login group [pengjiayou]:
Login group is pengjiayou. Invite pengjiayou into other groups? []: wheel
Login class [default]:
Shell (sh csh tcsh nologin) [sh]:
Home directory [/home/pengjiayou]:
Home directory permissions (Leave empty for default):
Use password-based authentication? [yes]: yes
Use an empty password? (yes/no) [no]: no
Use a random password? (yes/no) [no]: no
Enter password:
Enter password again:
Lock out the account after creation? [no]:
Username   : pengjiayou
Password   : *****
Full Name  : Charles Peng
Uid        : 1004
Class      :
Groups     : pengjiayou wheel
Home       : /home/pengjiayou
Home Mode  :
Shell      : /bin/sh
Locked     : no
OK? (yes/no): yes
adduser: INFO: Successfully added (pengjiayou) to the user database.
Add another user? (yes/no): no
Goodbye!
查一下,新建的用户加入了 wheel 组
root@freebsd:/home/ec2-user # id pengjiayou
uid=1004(pengjiayou) gid=1004(pengjiayou) groups=1004(pengjiayou),0(wheel)在 macOS 上执行下面的命令列出本地 ssh 秘钥,复制到剪切板
cat ~/.ssh/id_rsa.pub在 FreeBSD 13 上切换到刚刚新建的用户
su - pengjiayou新建 .ssh 文件夹
mkdir -p ~/.ssh使用自带的 ee 编辑器把刚刚复制的内容粘贴到 ~/.ssh/authorized_keys 文件中
ee ~/.ssh/authorized_keys接着就可以使用 ssh [email protected] 连接服务器了。
ssh [email protected]doas 和 sudo 差不多,FreeBSD 下我更喜欢用 doas ,先切换到 root 用户
pengjiayou@freebsd:~ $ su -
root@freebsd:~ #
安装 doas
pkg install doas执行以下 doas ,表示安装成功了
root@freebsd:~ # doas
usage: doas [-nSs] [-a style] [-C config] [-u user] command [args]
编辑 /usr/local/etc/doas.conf 文件
ee /usr/local/etc/doas.conf加入一下内容
permit nopass keepenv :pengjiayou切换回新建的用户,然后用 doas 测试一下
root@freebsd:~ # su - pengjiayou
You can delete a range of ZFS snapshots (a-z) in multiple ways.
The following will delete d and all earlier snapshots:

zfs destroy mypool/data@%d

To delete d and all later snapshots:

zfs destroy mypool/data@d%

To delete all dataset snapshots:

zfs destroy mypool/data@%

Make sure to let ZFS perform a dry run (-n option) first and display (-v) what
it would do to confirm that the delete operation is removing exactly what you
intended.
		-- Benedict Reuschling <[email protected]>
pengjiayou@freebsd:~ $ doas pkg update
Updating FreeBSD repository catalogue...
FreeBSD repository is up to date.
All repositories are up to date.
这样就表示成功了!
前几天在 PayPal 后台预约了今日的直播:贝宝跨境精英学院 – 洞悉客戶优体验 抢占心智赢增长。直播主要内容是讲解 PayPal 卖家保障计划,与消费者服务管理,以及卖家如何提升消费者运营服务,减少投诉率与 PayPal 纠纷率。
我在直播的时候用 OneNote 记了一些笔记,其实就是3位嘉宾的 PPT 的部分内容,如果你也在使用 PayPal 且对 PayPal 投诉和争议方面的政策不够了解,请下载我整理的 PDF ,结合截图上的文字对 PayPal 的政策有个大致的了解。
本人使用 PayPal 收款有些年头了,但是如果你跟我一样,还是不熟悉 PayPal 的卖家保障计划,投诉、争议方面的政策,或者有关退单(Chargeback)方面的政策,那么请结合以上我整理的 PDF 和以下 PayPal 官方的文档:
我使用 WooCommerce 搭建独立站已经有 5 年多的时间了,因为业务量并不大,前期也没有可用的信用卡收单渠道,后期虽然连连和 PingPong 都推出了信用卡收单业务,但 WooCommerce 的 PayPal 插件已经可以实现在支付页面直接输入信用卡卡号完成支付,PayPal 一直是我独立站的唯一收款方式。这么多年下来,一直是安全的、满意的。

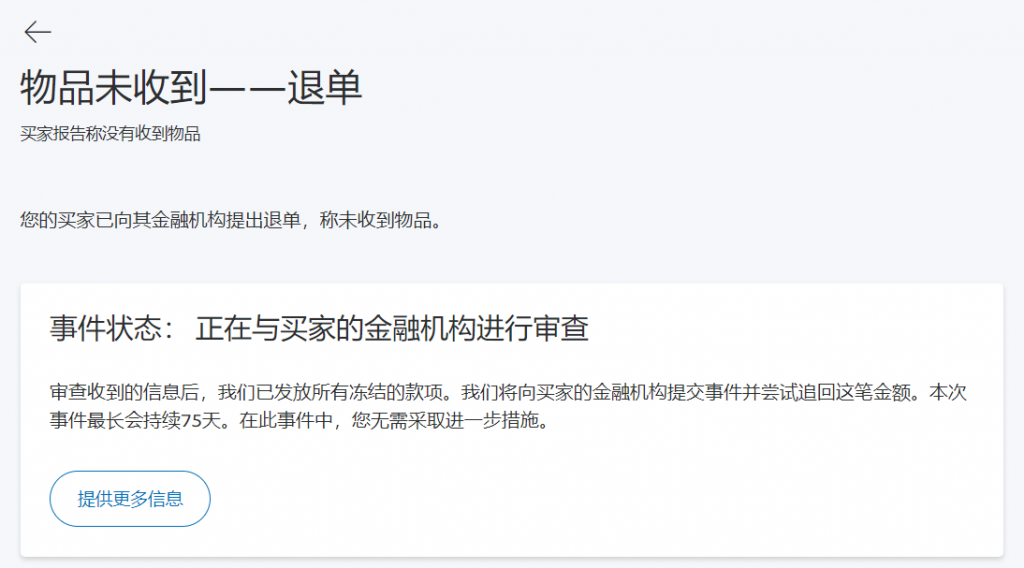
以前没有特别留意到底有多少是退单方面的投诉,印象中买家没有收到货物/或者他不知道在哪查询物流,或者收到货之后不满意的投诉很多,但近期收到了不少退单的 Case ,而且 PayPal 处理的让我非常满意。
从以上截图内容可知,退单是买家/信用卡持卡人对信用卡发卡行/银行提出的退款请求,但因为我的交易符合卖家保障计划的要求,PayPal 先期已经为我解除了该笔订单在退单发生时冻结的款项,而 PayPal 是否能从持卡人开户行/银行追回这笔款项,已经不是我(卖家)该承担的风险了。
很多人抱怨 PayPal 的手续费高(3.9%+30 美分),但是别忘了国外 Visa/MasterCard 等发卡行的手续费本来就高,且人家还承担了更高的风险(不知道国内的信用卡收单业务是如何处理退单的)。
最后,感谢贝宝中国,我看直播又中奖了。是的,又中奖了无线充,上次贝宝中国的直播,我中了一套茶具。😊

Google 刚推出了一个叫 Google Play Games 的应用,允许你在 PC 上玩安卓版的游戏,该应用不是基于 Windows Subsystem for Android 开发,而是 Google 自己为 Windows 平台开发的运行安卓应用(游戏)的平台。对硬件和操作系统的要求如下:
目前,该服务还是 Beta 状态,面向澳大利亚,香港,韩国,台湾及泰国测试中,首先上线的有 40 多款游戏,未来会首先面向这些国家及地区正式推出。
中国嘛,不知道是否有戏,等吧。

Cloudflare 上月推出了一个叫 Email Routing 的免费服务,如果你的域名不打算开通企业邮箱,你可以用这个服务创建一个邮箱,并把发送到这个邮箱的邮件,转发到你常用的邮箱里。
这个服务暂时需要邀请才能开通,我在12月1号有幸收到邀请,其中一个域名正好以前使用类似的收费服务,因此可以体验一下这个邮件转发服务。开通过程很简单,系统会为你自动添加所需的 MX 记录,完成之后即可创建一个以你域名为后缀的自定义邮箱。

如上图所示,Cloudflare 的邮件转发服务有如下特性:
Cloudflare 又做了件好事,我之前那个收费服务虽然很便宜,但这笔支出又可以省下来了。如果你像我一样有多个域名,但是又不想每个域名都开通企业邮箱,这个免费的邮件转发适合你。
注意:因为一个域名只能支持一个邮件服务商的 MX 记录,如果你的域名开通过腾讯企业邮箱或者其它的免/付费邮箱服务,Cloudflare 的这个服务不要开通,否则可能导致收不到邮件。

真是后知后觉,之前只从抖音听说过 OpenEuler ,还不知道(昨天才知道)阿里云搞了一个 OpenAnolis 系统。以前去 OpenEuler 网站了解过,大概是一个基于 RHEL 的 Linux 发行版。而 Anolis OS 呢,同样是基于 RHEL ,目标是做一个 CentOS 8 在2021年底停止维护之后的替代品。
不知道为啥中国公司这么喜欢 Redhat 系的 Linux 发行版,中国联通 90% 以上的服务器都使用了 CentOS 。当然了,我最早学习 Linux 也是从 Fedora 开始的,但最近很多年无论是 Linux 桌面还是服务器上我都更喜欢 Debian 系,主要是 Ubuntu 啦。
全球开源发展20余年,以前中国就没有一个 Linux 的上游社区,现在随着国产 CPU 的崛起,本土创新开源操作系统平台应运而生。OpenAnolis 除了支持 x86 和 amd64 这两种常见架构之外,还支持飞腾、海光、兆芯、鲲鹏,龙芯等国产芯片。
据公开信息统计,华为对 Linux 贡献了13762条代码,目前已经超过Ubuntu和其母公司Canonical的总贡献数,阿里则是1105条。这两家公司的开源系统,一个叫“欧拉”,一个叫“龙蜥”。如果还说人家是换皮,多少有点不合适了吧,真“国产”无疑啊,不仅为国内数字基础设施提供操作系统,还为国际开源软件贡献力量!

目前 OpenAnolis 已经登陆阿里云 ECS 了,不过只有 8.2 版,正好我有一台马上到期的 ECS 服务器,装个 OpenAnolis 8.2 试试看。OpenAnolis 一共有两种内核:
其中ANCK是由社区Cloud Kernel SIG组基于上游4.19 LTS kernel研发,提供对稳定,性能,隔离能力的增强,和海光、飞腾、兆芯、鲲鹏芯片的完善支持。既然是一个中国特色的发行版,我选择了 ANCK 内核。
[root@iZbp14664y88ufuyrhsokhZ ~]# cat /etc/os-release
NAME="Anolis OS"
VERSION="8.2"
ID="anolis"
ID_LIKE="rhel fedora centos"
VERSION_ID="8.2"
PLATFORM_ID="platform:an8"
PRETTY_NAME="Anolis OS 8.2"
ANSI_COLOR="0;31"
HOME_URL="https://openanolis.cn/"
嗯,果然是 Anolis OS !
[root@iZbp14664y88ufuyrhsokhZ ~]# dnf update
Failed to set locale, defaulting to C.UTF-8
Last metadata expiration check: 0:11:08 ago on Mon Oct 25 00:56:59 2021.
Dependencies resolved.
=======================================================================================================================================
 Package                          Architecture            Version                                        Repository               Size
=======================================================================================================================================
Upgrading:
 anolis-gpg-keys                  noarch                  8.2-14.an8                                     BaseOS                   10 k
 anolis-release                   x86_64                  8.2-14.an8                                     BaseOS                   15 k
 anolis-repos                     x86_64                  8.2-14.an8                                     BaseOS                  9.6 k
 microcode_ctl                    x86_64                  4:20191115-4.20210608.1.an8                    BaseOS                  4.2 M
 virt-what                        x86_64                  1.18-7.an8.1                                   BaseOS                   35 k

Transaction Summary
=======================================================================================================================================
Upgrade  5 Packages

Total download size: 4.3 M
Is this ok [y/N]: y
Downloading Packages:
(1/5): anolis-repos-8.2-14.an8.x86_64.rpm                                                              249 kB/s | 9.6 kB     00:00
(2/5): anolis-release-8.2-14.an8.x86_64.rpm                                                            380 kB/s |  15 kB     00:00
(3/5): anolis-gpg-keys-8.2-14.an8.noarch.rpm                                                           215 kB/s |  10 kB     00:00
(4/5): virt-what-1.18-7.an8.1.x86_64.rpm                                                               1.1 MB/s |  35 kB     00:00
(5/5): microcode_ctl-20191115-4.20210608.1.an8.x86_64.rpm                                               25 MB/s | 4.2 MB     00:00
---------------------------------------------------------------------------------------------------------------------------------------
Total                                                                                                   21 MB/s | 4.3 MB     00:00
Running transaction check
Transaction check succeeded.
Running transaction test
Transaction test succeeded.
Running transaction
  Preparing        :                                                                                                               1/1
  Running scriptlet: anolis-gpg-keys-8.2-14.an8.noarch                                                                             1/1
  Upgrading        : anolis-gpg-keys-8.2-14.an8.noarch                                                                            1/10
  Upgrading        : anolis-release-8.2-14.an8.x86_64                                                                             2/10
  Upgrading        : anolis-repos-8.2-14.an8.x86_64                                                                               3/10
  Upgrading        : virt-what-1.18-7.an8.1.x86_64                                                                                4/10
  Upgrading        : microcode_ctl-4:20191115-4.20210608.1.an8.x86_64                                                             5/10
  Running scriptlet: microcode_ctl-4:20191115-4.20210608.1.an8.x86_64                                                             5/10
  Cleanup          : anolis-release-8.2-13.an8.x86_64                                                                             6/10
  Cleanup          : anolis-repos-8.2-13.an8.x86_64                                                                               7/10
  Cleanup          : anolis-gpg-keys-8.2-13.an8.noarch                                                                            8/10
  Running scriptlet: microcode_ctl-4:20191115-4.20210525.1.el8.x86_64                                                             9/10
  Cleanup          : microcode_ctl-4:20191115-4.20210525.1.el8.x86_64                                                             9/10
  Running scriptlet: microcode_ctl-4:20191115-4.20210525.1.el8.x86_64                                                             9/10
  Cleanup          : virt-what-1.18-6.el8.x86_64                                                                                 10/10
  Running scriptlet: microcode_ctl-4:20191115-4.20210608.1.an8.x86_64                                                            10/10
  Running scriptlet: virt-what-1.18-6.el8.x86_64                                                                                 10/10
  Verifying        : anolis-gpg-keys-8.2-14.an8.noarch                                                                            1/10
  Verifying        : anolis-gpg-keys-8.2-13.an8.noarch                                                                            2/10
  Verifying        : anolis-release-8.2-14.an8.x86_64                                                                             3/10
  Verifying        : anolis-release-8.2-13.an8.x86_64                                                                             4/10
  Verifying        : anolis-repos-8.2-14.an8.x86_64                                                                               5/10
  Verifying        : anolis-repos-8.2-13.an8.x86_64                                                                               6/10
  Verifying        : microcode_ctl-4:20191115-4.20210608.1.an8.x86_64                                                             7/10
  Verifying        : microcode_ctl-4:20191115-4.20210525.1.el8.x86_64                                                             8/10
  Verifying        : virt-what-1.18-7.an8.1.x86_64                                                                                9/10
  Verifying        : virt-what-1.18-6.el8.x86_64                                                                                 10/10

Upgraded:
  anolis-gpg-keys-8.2-14.an8.noarch                       anolis-release-8.2-14.an8.x86_64        anolis-repos-8.2-14.an8.x86_64
  microcode_ctl-4:20191115-4.20210608.1.an8.x86_64        virt-what-1.18-7.an8.1.x86_64

Complete!
升级下系统看看,发现有个错误提示”Failed to set locale, defaulting to C.UTF-8″
[root@iZbp14664y88ufuyrhsokhZ ~]# dnf install glibc-langpack-en
[root@iZbp14664y88ufuyrhsokhZ ~]# localectl set-locale LANG=en_US.UTF-8
#Set LANG and LC_ALL/LC_CTYPE
[root@iZbp14664y88ufuyrhsokhZ ~]# export LANG=en_US.UTF-8
[root@iZbp14664y88ufuyrhsokhZ ~]# export LANGUAGE=en_US.UTF-8
[root@iZbp14664y88ufuyrhsokhZ ~]# export LC_COLLATE=C
[root@iZbp14664y88ufuyrhsokhZ ~]# export LC_CTYPE=en_US.UTF-8
执行这几个命令之后问题解决。
Anolis OS 8.2 正式版发行声明中说 Anolis OS 一共有4个 REPO 源
但是系统自带的这个 Extra 不知道是干啥的,而且 Plus 源并没有开启。
[root@iZbp14664y88ufuyrhsokhZ ~]# sudo dnf repolist
repo id                                                     repo name
AppStream                                                   AnolisOS-8.2 - AppStream
BaseOS                                                      AnolisOS-8.2 - BaseOS
Extras                                                      AnolisOS-8.2 - Extras
PowerTools                                                  AnolisOS-8.2 - PowerTools
开启 Plus 源之后看看:
[root@iZbp14664y88ufuyrhsokhZ ~]# sudo dnf config-manager --set-enabled Plus
[root@iZbp14664y88ufuyrhsokhZ ~]# sudo dnf update
AnolisOS-8.2 - Plus                                                                                     24 MB/s | 4.9 MB     00:00
Last metadata expiration check: 0:00:01 ago on Mon 25 Oct 2021 01:29:07 AM CST.
Dependencies resolved.
Nothing to do.
Complete!
[root@iZbp14664y88ufuyrhsokhZ ~]# dnf search tengine
Last metadata expiration check: 0:00:11 ago on Mon 25 Oct 2021 01:29:07 AM CST.
==================================================== Name Exactly Matched: tengine ====================================================
tengine.x86_64 : A distribution of Nginx with some advanced features
这个源里之后OpenAnolis SIG 组里面的一些软件,想装个 htop 都没有,因为和 CentOS 是 100% 兼容的,还得装个 EPEL 源才行。
sudo dnf install epel-release
sudo dnf clean all && dnf makecache
之后总算可以使用 dnf install htop 来安装 htop 了。
其实我用 Linux 当服务器也只会一些基本的操作,搭建一些基本的服务。装个 Caddy 2 看看。
dnf install 'dnf-command(copr)'
dnf copr enable @caddy/caddy
dnf install caddy
没问题,除了可以使用 epel 源,也可以使用 copr 源,感觉速度比我搬瓦工的 CentOS 7 快,挺好。我有点喜欢这个发行版了。

Windows 11 如期而至,其实如果按照美国时间来看的话,中国还要早一些!如此福利,没理由不赶紧上车。但是等 Windows 更新推送,估计还得等很久。莫慌,Windows 11 安装助手已经来了。
用 Windows 11 安装助手升级 Windows 10 到 11, 你需要下载电脑健康状况检查应用检查是否符合升级条件。话说如果 Windows 更新页面提示你可以运行 Windows 11, 你就没必要下载检查程序了,直接下载安装助手吧。

第一步 下载 Windows 11 安装镜像

第二步 验证下载的 Windows 11 镜像

第三步 开始安装 Windows 11 。进度走到 100% 之后 30 分钟会自动重启电脑,但是可以手动重启。
重启之后就是焦急的等待了,系统还会自动重启几次,直至出现全新的 Windows 11 登陆界面,其实和 Windows 10 也差不了多少,看到那重新设计的 Wifi 和电池图标之后,内心的激动溢于言表。
赶紧进入桌面,一切正常。微软又做了件大善事啊,大版本更新居然也不要钱。这么多年,终于再一次干掉经典的开始菜单了!我知道又有很多人要怀念它,但是当年我喜欢的 Windows 8 还不是说没就没呀。喜新厌旧的我,相信很快就能适应了。